Showing posts with label Family Room. Show all posts

Update on the Family Room

1.27.2016

Well, it's certainly not finished, but I'm happy to say that we've got one room in the house feeling a little bit more livable! Here's a reminder of what it looked like before:


We still have to:

  • Paint and replace the cabinet doors at the bottom of the bookshelves
  • Paint the shelves 
  • Polycrylic the bookshelves and mantel
  • Paint the ceiling (maybe a light blue/green?)
  • Replace the fluorescent lighting with LED's
  • Paint the vent cover
  • Find a new coffee table (this is a super old one that's been hanging out in our basement for about seven years!)
This is the current way that we're using the room - mainly as a TV/play room, but we're thinking we eventually want to move the television to the living room and make this more of a family/sitting room. I'd love to replace the TV stand with something that has a little more personality/character. My parents gave us my old piano as as Christmas gift, now that we actually have space for it, and that might end up in here as well! And I hate the textured ceiling. The plan right now is to paint it, but I'd love to do something a little more extreme - drywall? scrape it? cover it somehow? Kev isn't into any of those ideas, unfortunately. But for now this is working for us, and we're all loving our lighter, brighter, more functional family room. xo, Lauren


So Long Carpet, Hello Hardwoods!

1.19.2016
One of the first rooms we definitely wanted to tackle was our family room - AKA "the cave". It's the room where we spend most of our time - a lot of the girls' toys are housed in the cabinets and our TV is in this room. Plus, the fireplace! But it was SO dark and the carpet was super gross with the dog hair and awful smell in the carpet. 

While we'd love some drywall or even some shiplap in this space, we're working with a small budget, so here's what we decided to do with the space for now:

1. Prime & paint the paneling
2. Rip out the carpet
3. Add hardwood floors or refinish hardwoods (depending on what we found under the carpet)
4. Paint the ceiling
5. Possibly paint the brick on the fireplace
6. New curtains & area rug

We started by priming and painting most of the wood in the space. We painted first so that the carpet could act as a giant drop cloth, just in case there was hardwood flooring hiding under there. It took two coats of primer and 2-3 coats of paint + primer to get the job done. The wood was super dark and insanely thick, and it just sucked up the paint. 

Then we decided to remove the carpet to see whether or not we needed to buy hardwoods. We assumed at the very least we'd have to refinish the floors even if we did find hardwoods under the carpet, because why would someone cover up hardwood flooring with carpet unless it was damaged, right? Well apparently people actually do cover up perfectly good, beautiful, mint condition hardwoods with gross wall to wall carpet. When we pulled up the carpeting, there was a super THICK high quality carpet pad under it, and beneath that were absolutely beautiful hardwoods. I think the thick pad saved the floors from being stained by the dogs and kept them in mint condition. I couldn't believe our good luck. It saved us a ton of money and a boatload of back-breaking work.


We're still plugging away at the paint, but I can't wait to show you the transformation so far! xo, Lauren

Follow Along! Style Cure 2014

10.27.2014


Guess what! I'm crazy and decided to participate again in Apartment Therapy's Style Cure. I figure maybe it will give us some motivation to get something done around the H-Haus! You can follow along here if you're interested. xo, Lauren

P.S. Thanks to my mama for taking my new "head shot" with my dad's fancy camera while my children hung all over her! Also not pictured: the mountain of toys that litter the floor of this room - ha!

Family Room Update

8.10.2014

We formerly had a pretty decent little art wall in this little section of the family room. That is, until I stole most of it to fill up this corner. As a result, this part of our room has been looking pretty forlorn the past few months. It's not that I didn't have any artwork - it was mainly just finding the time to hang it. So when Apartment Therapy asked me to fill up a wall in my living room with art, I seized the opportunity. To see the before and after, find sources for the artwork, and watch a fun little animated GIF of the process (created with my trusty iPhone, the girls' play kitchen, and a C-clamp due to my current lack of camera), head on over to Apartment Therapy.

And for those who may be curious, here are the sources for the other items in the space:

Family Room Updates

3.26.2014
A few months ago I was trying to decide whether or not to squeeze a mini gallery wall into this little corner of our family room and I did this mock up and took a picture for debate purposes (during which Violet hopped into the picture and kind of stole the show):


So anyway, I decided to go for it, and while it's still a work in progress it's not looking too shabby at the moment. Things are actually nailed to the wall this time rather than leaned, taped, or sticky-tacked, so that's an improvement! (And the cats decided to get in on the action in this picture - Violet was at her grandparents'):


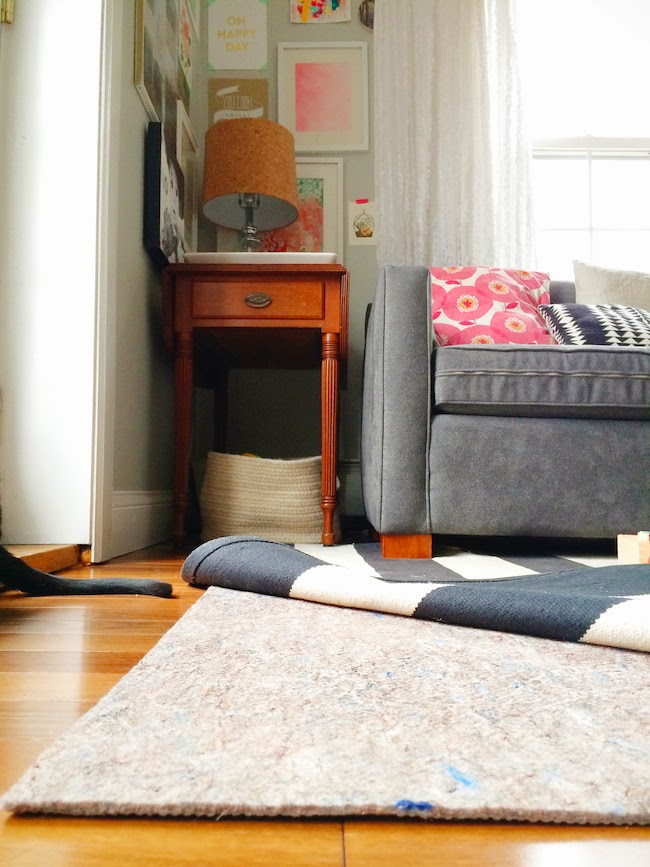
We also were considering replacing our rug with something a little bit more plush. I love the look (and price) of flat woven rugs, but they aren't exactly the best for kids to crawl around and play on. I hated to spend the money at the moment - plush, pretty rugs can be sooo pricey, but luckily we were saved at the last moment by the lovely people over at Rug Pad USA. We had a no-slip "pad" before, but it definitely didn't add any cushioning whatsoever. I never realized what a difference a good rug pad could make until we tried one out. They sent us one of their premium-lock rug pads for the family room and an eco-cushion rug pad for the rug in Lucy's nursery, and I am truly amazed by the improvement they've made. The rugs are so much more comfortable to walk and sit on and don't shift around like they used to. Definitely recommend them.


Now if only I could get a better camera I'd be a happy camper. Ours kind of bit the dust - it's just old I guess and isn't taking nice photos any more, so I've been stuck with just the iPhone for now. Someday maybe we'll be able to afford a shiny new DSLR! A girl can dream, right? Luckily the iPhone isn't so terrible. Here are some cute pics I got of Violet and Lucy romping around on the couch the other day:


Not too terrible for a phone. This is like their favorite thing in the world to do these days - rip all of the pillows off of the couch and bounce around like crazy people. And Violet just loooves when Kev builds forts and slides and things for her them. Being a kid is the best. No wonder Violet never wants to grow up :)

P.S. You can find us on Instagram @alovelylark

Gallery Wall - Do or Don't + a Review for Lamps.com

1.08.2014
A Lovely Lark- Gallery Wall - Do or Don't? One thing that I find sad about living in a small house is that there isn't much wall space for art. It's probably for the best, as I would have spent a lot more money on pieces that I love if I only had the space for them. One corner where I always wanted to put more artwork is this little corner between the sofa and the French doors in the family room. The problem is that we need a lamp on the end table for light, but I always felt that it would be silly to put artwork there because the lamp would cover up most of it. So when Lamps.com asked me to review their clear Dimond table lamp, I was excited. It has a clear base, and I thought that the glass would provide a better opportunity to hang some artwork in the space.

At first I wasn't sure how I felt about the cork shade - while I love the warm texture I didn't know how much light it would really give off. Luckily while it's not as bright as a lamp with a traditional shade it does give off a decent amount of light, so I'm very happy with it.

Next I decided to do a mock up of a collage/gallery wall to see if I liked it. All of this artwork was pilfered from elsewhere in the house with the exception of the canvas photos of the girls, and none of it is actually nailed to the wall. It's either leaning against the wall, stacked on top of one another, taped, or sticky tacked, but now that I have it all "up" I kind of love it and don't want to return everything to its proper place. So what do you think? Are you a fan of the gallery wall look, or is it too much? For reference, here's what the space looked like before. Thanks for any input! xo, Lauren

P.S. Isn't Violet just too precious in these photos? She saw me taking pictures, clambered up on the arm rest of the couch and flashed me the cutest smiles, how could I resist? Love my little ham.

Around Here

3.05.2013
a-lovely-lark-back-room This little room is one of my favorite rooms in the house. I get to change out the artwork all of the time and it gets a lot of natural light during the daytime. Usually the floor is covered with a train or dress up clothing or blocks or baby dolls, but today it happened to be clean (miracle!) and I took the opportunity to take a few snapshots. Hope you're having a lovely Tuesday! xo, Lauren

DIY Birch Veneer Artwork

1.25.2013
Here's some easy (and inexpensive) DIY artwork for you just in time for Valentine's Day:


Step 1: You will need an X-acto knife, a piece of cardboard or other cutting surface, a glue stick, birch veneer paper (can be purchased here - I used the 12"x12" size), and a print out of your text (flipped so that it looks backwards). You can download my 'for like ever' file (already reversed) here.

Step 2: Glue the printed text to the back of your birch veneer paper. Make sure it's glued so that you can see the text (and the text should look backwards)

Step 3: Place cardboard or another cutting surface beneath your paper and carefully cut through both the printed text and birch veneer paper with your X-acto knife.

Step 4: Mount to a piece of paper with glue or spray adhesive and frame. Hang and enjoy!


Cheap, easy, pretty - checks all of my boxes! Happy happy Friday!  xo, Lauren

H-Haus Year in Review & Goals for 2012: The Back Room

1.02.2012
2011 was a year of slow but steady progress on the H-Haus. I thought I'd write a few posts to prove to myself that we have made some headway (little by little) and to figure out my goals for our home in 2012. We'll start with the room that has come nearest to completion:

The Back Room

The back room was the big transformation of the H-Haus this year. We started out the year with freshly painted walls and a new charcoal-colored sofa, and not much else. Luckily the Hubster and his dad are pretty handy and installed new hand-built cabinetry into our small nook:


Next came the wallpaper. After some serious debate about the proper way to hang it, it went up smoothly and added a fun burst of color and pattern to the otherwise neutral-Nelly room.


On the adjacent wall, we threw up some magnetic paint followed by chalkboard paint, which the Hubster then framed out with trim:


We left just enough space in between our new pillars of storage bliss for the Hubster's grandmother's desk. I never thought we'd have space for an 'office' in the H-Haus but it just goes to show even small spaces can have big function!


To add even more storage, we snagged ourselves a bookshelf from IKEA and shared a few tips on how to style it with...books! (mostly) Imagine that.


And after a loooong and intense rug search and two duds, we finally (I think I hope) found a rug that's going to stick around for a while:


And after a long wait and much debate, we decided on a photo of the babe to have blown up onto a canvas.


For Christmas we bought ourselves a bit of bling for our little antique desk: a shiny new iMac! 


And last, but not least, we installed a back-ordered long-awaited sconce and carved out a little space for more of our growing art collection.


Although there are still a few details we'd still like to add (a couple of throw pillows, a little touch-up paint, and a few more additions to our art wall) I'd say this room is pretty much finished! (Happy sigh)

Stay tuned tomorrow to find out which room has come sooo far but still has a looong way to go...

And in Other News...

6.14.2011
The cabinet doors are finally on in the back room!


Now we just need to paint the doors and shelves plus give everything a good coat of poly and we've got storage baby.


© A Lovely Lark All rights reserved . Layout by Blog Milk Powered by Blogger

Pin It button on image hover