Pages
Showing posts with label Art Projects. Show all posts
Showing posts with label Art Projects. Show all posts
Free Printable Magnetic Jack o'Lantern Craft
I wanted to come up with a fun printable to use up the rest of my magnetic printer paper (and keep my girls from fighting over the printable magnetic haunted house that I made for them last year!) so I created these fun Halloween jack o'lanterns! There are two cute pumpkin shapes and a ton of eye, nose, and mouth shapes to choose from. You could even use whiteboard markers to color them in if you choose. Hope your kids enjoy them as much as mine do! xo, Lauren
Download the printable pumpkins and face shapes right here:
Pumpkin 1
Pumpkin 2
Eye Shapes
Nose Shapes
Mouth Shapes
(And you can find the magnetic printer paper right here)
Pumpkin Fun
Since I'm low in the energy department these days, I wanted to keep our pumpkins fairly simple this year. Kevin carved a traditional pumpkin, but Violet and I experimented with a few other mediums:
For Violet's pumpkin I taped off a letter 'V' and let her go to town with paint. Then we just peeled off the tape and, voila! Pretty pumpkin.
I went super simple with mine and just cut some small triangles out of some rolls of washi tape that I had laying around the house. Took me about five minutes total :)
And the mini one that Violet picked out looked super cute on our little jadeite cake stand with a glass cloche on top. (She keeps asking me to get out her 'trapped' pumpkin though lol) So there you go - three simple and fun pumpkin projects - my favorite kind! xo, Lauren
Traveling with a Toddler: Part 1
2. Foam Alphabet Stickers - Add these to your kid's drawing to spell out letters of names, words, etc. Really any stickers would be just fine, but the foam adds an extra element of fun and the educational aspect of the letters is a definite bonus.
3. Melissa & Doug Reusable Sticker Pads - I love these sticker books, because they not only contain stickers but backdrops on which to place them. My favorites are the Habitats sticker book where kids can place animal stickers into different landscapes and the Play House! sticker book, with a variety of interior backgrounds on which your child can add furniture, people, etc.
4. Fisher Price Doodle Pro Travel Doodler with Light - Another fun no-mess surface on which to draw, write, and erase. This one is a great compact size perfect for travel and features a light.
5. Pipe Cleaners - basic and simple, but you can create a ton of fun projects with this no-mess medium. Just to name a few, you could try this shiny alphabet, these fun faces, or these super simple bracelets.
So that's what I've got so far. I still have a few days to prep for the trip, so if you have any suggestions for fun plane-friendly toddler activities I'm all ears!
xo, Lauren
*Yes we have a house sitter, so don't race over to steal my TV!
Friday Favorites
An adorable DIY dollhouse.
Eight ways to pimp your lemonade.
You smell.
A worm party and a dirt party!
The basics of herbs
DIY avengers bookmarks - so fun.
1940's hair how-to.
Make your own graphic tee.
Play with your food
Be a Fruit Loop in a world full of Cheerios!
Happy Friday! xo, Lauren
Image Source
Around Here
I've been in party crafting mode this past week - trying to pull off a pretty party but on a budget. We ended up moving the party date (to this coming weekend - eek! ) to make sure that Violet's Grammy could be there. Since it's Cinco de Mayo I think we're leaning more towards that as a theme, especially since I'm going to a Cinco de Mayo work shindig on Friday and she's lending me some of her loot (free stuff - score!). And who doesn't love a good fiesta? Not going to go too crazy theme-y but maybe some fringe, some pin-the-tail-on-the-donkey action and a couple of sombreros thrown in there. Ole!
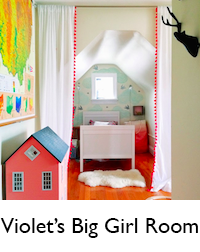
In other news I'm still working on Violet's big girl room. I hung the hooks in the above photo myself (well, with my Dad's supervision lol). But power tools and me have never been best buds, so I must say that I'm pretty proud of myself.
I've been doing pancakes on the weekends now so that Violet has a change from her normal eggs, toast, and cereal routine. She gobbles them up - so excited that she has something new and tasty to eat. And speaking of tasty I was so worried about her birthday cake being horribly inedible (baking is also not my thing - especially not a dairy and soy free cake!) but I found out that Duncan Hines cake mix is dairy free and mostly soy free (it has soy oil which Violet can have) so she's going to have a tasty birthday cake after all - hurray!
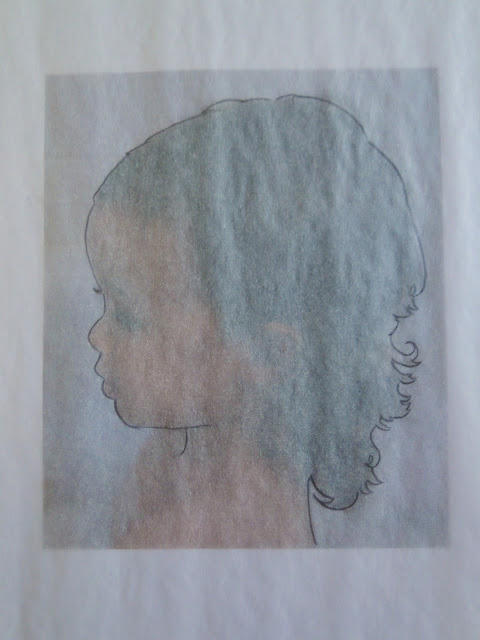
Other than that I've been finishing up a few projects that I've been procrastinating on around the house. Nothing like a party to get your butt in gear. I painted Violet's silhouette, am sprucing up the art wall in our back room, and we got half of the wallpaper up in the living/dining area. Unfortunately the Hubster seems to have been struck by some sort of plague (he normally doesn't get sick, like ever) so we'll see if he's up to another round of wallpaper cutting, pasting, and hanging before the party. Anyway, I'm off to dive back into my world of crafting craziness. Wish me luck! xo, Lauren
P.S. Follow along on Instagram - @withtwocats
10 Easy Steps to Create a Silhouette
I've had a thrift store frame just screaming for a pretty silhouette of my favorite munchkin for a couple of years now. For whatever reason I kept putting off the project, but this past weekend I was in the crafting zone and decided to go for it. It turned out to be super quick and easy. Here's what I did in ten easy steps:
Step 3: Print your photo and make sure it fits properly in the frame you have chosen:
Step 4: Place a piece of tracing paper over your photo and trace around the outside edge of the subject:
Step 5: On a piece of watercolor paper, trace the back insert of your frame:
Step 6: Flip your tracing paper over and center it on the shape you just traced. Trace over the your drawing to transfer the pencil lines onto the watercolor paper.
Step 7: Lighten your pencil lines with an eraser. You should be able to faintly see the lines, but you don't want them to be visible after you paint.
Step 8: Fill in your drawing using the medium and color of your choice. I chose watercolor paint (Grumbacher Indian Yellow). Use wide, even strokes for an even finish, but if you can see some of your brush strokes it's okay - it just gives it a painterly look.
Step 9: Cut out your shape
Step 10: Frame and hang!
From start to finish this entire project took me less than half an hour. I've been wanting to do this for ages and now I can't believe I didn't do it sooner - it was so quick and easy. Happy painting!
xo, Lauren
Step 1: Take a photo of your subject's profile (If you are photographing a toddler it's best to do this candidly if possible - I took my photo while she was in the bathtub :))
Step 2: Open the photo on your computer and go to the print screen. Resize the photo's scale. I tried a few different sizes, but 30% worked best for the frame that I was using.
Step 3: Print your photo and make sure it fits properly in the frame you have chosen:
Step 4: Place a piece of tracing paper over your photo and trace around the outside edge of the subject:
Step 5: On a piece of watercolor paper, trace the back insert of your frame:
Step 6: Flip your tracing paper over and center it on the shape you just traced. Trace over the your drawing to transfer the pencil lines onto the watercolor paper.
Step 7: Lighten your pencil lines with an eraser. You should be able to faintly see the lines, but you don't want them to be visible after you paint.
Step 8: Fill in your drawing using the medium and color of your choice. I chose watercolor paint (Grumbacher Indian Yellow). Use wide, even strokes for an even finish, but if you can see some of your brush strokes it's okay - it just gives it a painterly look.
Step 9: Cut out your shape
Step 10: Frame and hang!
From start to finish this entire project took me less than half an hour. I've been wanting to do this for ages and now I can't believe I didn't do it sooner - it was so quick and easy. Happy painting!
xo, Lauren
Quick & Easy Valentines
That you can make with things you have laying around the house!
1. Supplies: The end of a bunch of celery, a pencil eraser carved into a heart, a sponge cut into a heart
Not pictured: (painter's tape, paint, paintbrushes, and a plastic container)
2. Pour the paint into a large plastic container and spread it out flat with a paintbrush
3. Dip your tools into the paint and have at it!
3. Use painter's tape to tape off a shape
4. Or to write letters & words!
5. Don't be afraid to get messy!
6. Voila! Fold and write your message with a metallic paint pen for quick and easy (and toddler-friendly) Valentines :)
xo,
Lauren & Violet
Etsy Love: Knot & Bow
Aren't these heart stickers from Knot & Bow just adorable?! I can think of a million ways to use them.
Maybe for Valentine's Day?
xoxo,
H-Haus Year in Review & Goals for 2012: Violet's Big Girl Room
Yesterday I shared the progress that we've made on the H-Haus back room. It's nearly complete and it's such a great feeling! Today I'm sharing the room that has come probably the furthest in a year, but still has such a looong way to go:
Violet's Big Girl Room
Another big (but still very incomplete) transformation of 2011 was Violet's big girl room. We've been using it as a play room for now, but when she's ready for it I'm hoping that it will be ready for her. We started with a pretty horrific before:
And needed pretty much a full overhaul. We ripped out the wall-to-wall zebra carpet, removed the animal-print-purse border, and exchanged the ginormous and ancient radiator for a smaller a less noticeable replacement. Next came some plaster-repair and dry-walling:
To get to where we are today:
A rug we purchased long ago from Anthropologie juuuust fit in the teeny tiny space. We hung up the banner that I made for Violet's first birthday party, threw in a few toys and an old chair, and called it a day. Since then I've slowly been gathering treasures here and there to finish the transformation from zebra bordello to a room fit for our little girl:
Etsy and the Land of Nod unearthed two pretty pillows and Lori Marie furnished the third as well as a pretty flower garland for the space. Since then I've gathered some terrarium prints, a lovely little pillow, a dottie quilt, a plush little dancer, a dollhouse made-with-love, a sweet little hook, and a squirrelly little lamp.
2012's to-do list will include:
Tomorrow I'm going to share the longest-running project at the H-Haus (and it's one of the smallest rooms!)
Violet's Big Girl Room
Another big (but still very incomplete) transformation of 2011 was Violet's big girl room. We've been using it as a play room for now, but when she's ready for it I'm hoping that it will be ready for her. We started with a pretty horrific before:
And needed pretty much a full overhaul. We ripped out the wall-to-wall zebra carpet, removed the animal-print-purse border, and exchanged the ginormous and ancient radiator for a smaller a less noticeable replacement. Next came some plaster-repair and dry-walling:
To get to where we are today:
A rug we purchased long ago from Anthropologie juuuust fit in the teeny tiny space. We hung up the banner that I made for Violet's first birthday party, threw in a few toys and an old chair, and called it a day. Since then I've slowly been gathering treasures here and there to finish the transformation from zebra bordello to a room fit for our little girl:
Etsy and the Land of Nod unearthed two pretty pillows and Lori Marie furnished the third as well as a pretty flower garland for the space. Since then I've gathered some terrarium prints, a lovely little pillow, a dottie quilt, a plush little dancer, a dollhouse made-with-love, a sweet little hook, and a squirrelly little lamp.
2012's to-do list will include:
- trim
- curtains
- a DIY botanical pull-down chart
- a floor lamp
- an antique serpentine dresser (maybe natural, maybe painted?)
- a mirror
- a completed dollhouse
- hand-painted pull-down shades
- sheets
- a twin mattress
- a headboard or bedframe
- and probably much much more
Tomorrow I'm going to share the longest-running project at the H-Haus (and it's one of the smallest rooms!)
2010 Gift Guides
If you're looking for more gift ideas for the little ones in your life - don't forget to check out last year's gift guides:
Happy gifting!


