Showing posts with label Holidays. Show all posts

Easter Beauties

3.24.2016
These two beauties were super excited when their Easter dresses arrived in the mail yesterday from Janie & Jack! When I got home from work I brought in their new dresses, not knowing that they had a few treasures ready to share with me! Lucy was "super duper" (her new catch phrase) proud of her Easter craft that she had made at her sitter's, and they had both been busy gathering a bouquet of "flowers" for me from the garden - roots and dirt still intact. They, of course, wanted to get dressed up right away, and it took all of our powers of persuasion to convince them that no, they could not wear them on our walk (considering that it was still long pants and jacket weather!) So they settled for wearing them around the house for now. Here's hoping that the weather is nicer on Sunday or we'll have to break out the tights and sweaters!


I love Janie & Jack's classic styles, especially for special occasions, so I was "super duper" excited when they offered to send over these gorgeous Easter dresses and bows for the girls. Here's what I chose:

Violet's dress, Violet's bow
Lucy's dress, Lucy's bow

I had a tough time deciding though - everything was so cute! What would you have chosen for your little ones? Hope everyone has a lovely Easter! xo, Lauren

Christmas Gift Guide 2015

11.30.2015

I don't have time in my life at the moment to create oodles of gift guides, but here are a few things that are currently at the top of my list for the kids this year:

Farmington Dollhouse
Beeswax Crayons
The 50 States Book
Home Book
KidKraft Lemonade Stand Set
Potholder Loom
Cubic Dollhouse
Keith Haring Paint Set
Alice's Adventures in Wonderland Book
Chalkie-Chalk
Maps Book
Fawn Doll
Bead Kit
My First Loom

Violet's really into crafty stuff at the moment, and the girls (and I) are obsessed with dollhouses. They really don't need another dollhouse, so I probably won't get either of them, but I'm dying over these two. and Violet loves the Maps and Home books, so I'm hoping she'll like The 50 States just as much! Lucy's also getting a ton of Dora books (it's all she wants to read!) and a used train table off of Craigslist, and Violet wants a Barbie house (if you know of any non-hideous Barbie houses PLEASE PLEASE PLEASE let me know!!!) xo, Lauren

Christmas Cards, Here We Come!

11.25.2015
Between being extra excited about the holidays this year and begin thrilled with the photos that we miraculously managed to get, I am on my game this year when it comes to Christmas cards! Last year our photos kept getting canceled and rescheduled due to the weather, so we didn't manage to get our cards sent out until New Year's Day rolled around! I've been trolling my favorite site for Christmas cards, Minted, and here are a few of my current faves:

Simple + Sweet:


1 . 2 . 3 . 4 . 5

Shiny + Sparkly:


1. 2. 3. 4

Pictures, pictures, pictures:


1 . 2

And since I'm (for once!) ordering early this year, I am super excited to take advantage of the Black Friday sale - 20% off orders of $150+ or 15% off with no minimum order! Just use code BF2015. Now the hard part - decision making! Which is your favorite? xo, Lauren


*Affiliate links included in this post

Christmas Finds!

11.14.2015
I'm super excited - I found some great Christmas gifts for the girls on Zulily today! Land of Nod, Hape Toys, and Kid Kraft! If you're shopping for your little ones you can find the sales here. xo, Lauren

Christmas Forest Advent Calendar - Free Printable

11.11.2013

We are trying to keep things fun and cheap here at the H-Haus this holiday season, so I decided to make our own advent calendar in lieu of buying a lot of decorations. It'll be a great display on a TV stand, console, or mantel and a fun activity for Violet (and someday for Lucy too!) I actually got the idea from some old paper party hats we had, but they weren't the right colors, so I decided to trace them and make my own version. Then we printed them out, decorated the "trees", and folded and taped everything together and voila! Cheap (and inexpensive) Christmas fun!

I've included the files for you all as a free printable as well, just download, print, decorate, and assemble - it's pretty self-explanatory but if you have any q's I'm happy to help! We used dot stickers (left over from our raid-your-craft-stash gift wrap last year) and a gold paint pen to decorate our trees, but you could leave them plain too and they'd look just as pretty. To put them together I used packing tape because it's a lot stronger than regular tape and easier to work with than glue. I printed some on a thick textured paper which looked really pretty - almost like watercolor, but I ran out and printed the rest on regular printer paper and that worked just fine as well. You can hide little gifts under each cone and in the packages, then lift up the cone on the appropriate day - easy peasy :) Downloads available after the jump!

Favorite Holiday Cards 2013

11.07.2013

We'll most likely be going with our usual holiday photo cards from Minted this year (it just seems expected when you have kids - all of the relatives want to see a cute picture)! But if I was going for a traditional card, I'd definitely choose one of these lovelies...

Clockwise from top left: Sir Rudolph, Reindeer, Letterpress Trees, Thumpety Thump Thump, Let it Snow, Secret Decoder Tree, Joy, Season's Greetings, O Christmas Tree, Deck the Halls

Raid-Your-Craft-Stash Gift Wrap

12.18.2012
This year I decided to try not to buy any new supplies with which to wrap our gifts (other than some kraft paper) and instead trim down my leftover craft supply stash. Pretty much every present ended up being a little different, but I tried to stick with a general color theme so it didn't get to crazy. I made some yarn pom poms, used up some leftover tissue paper fringe from my DIY 'confetti system' ornaments, and a few extra felted wool balls from the garland I made for our mantel as well.

I also found a few other random things - some dot stickers, printer paper (for snowflakes), ribbon, string, washi tape, doilies, and white paint. Then I went to work while I watched A White Christmas (one of my favorites!) on TV and munched on Christmas cookies. I tried to use  a lot of red and blue for Violet's because whenever anyone asked Violet what she wants for Christmas she says, "Pwesents." And if they ask her what kind of presents she says, "Wed, boo - my fav-it!" (Red and blue - my favorite!) She'll probably like my mom's gift wrap better (red and blue Sesame street gift wrap), but I had fun making ours. :)


P.S. I used these free printable gift tags

DIY Glitter Geometry Garland

11.28.2012


I'm trying to DIY as many of my ornaments as possible to save a little dough for baby number two. I was really crushing on this glitterered geometry garland from Leif, but it just wasn't in the budget. Here's how I made my own:

1. Print the templates and follow the instructions for creating a stellated dodecahedron and paper gems here. Use thick paper like cardstock or tag board so that your shapes are sturdy. Secure with tape, glue, or both:


2. Use a glitter spray paint like this one to coat your gems in glitter:


3. Use a very long needle (or tape two smaller needles together) to push string or fishing line through the tips of each gems and out the other side. Knot the string on each end of the gem, evenly spacing them apart:


4. Hang and enjoy!


P.S. Check out my other DIY ornaments here:

DIY Ornaments

DIY Colorful Yarn Pom Pom Ornament

11.23.2012
Because I really want to have a more colorful Christmas this year but can't afford to buy all new ornaments, I've decided to go DIY crazy and make as many of them as possible. I'm using the 'Colorful Christmas' idea board that I came up with as inspiration for the projects. First up today are colorful yarn pom poms, similar to this one at Leif.A-Lovely-Lark-DIY-Colorful-Yarn-Pom-Pom-Ornament Step 1: Choose your yarn color(s). You can go with as many or as few as you'd like.

Step 2: Start with your first color. Wrap it around three of your fingers until it is fairly thick. It takes a little experimenting to determine how much to wrap, but I would say err on the side of too thick rather than too thin.

Step 3: Snip off the end of the first color and repeat the same process (either on top of or beside the first color) with your next roll of yarn. Continue this process until you have wrapped all of your chosen colors around your fingers.

Step 4: Carefully remove your wrapped yarn from your fingers, keeping its shape.

Step 5: Place the wrapped yarn on top of a long piece of yarn. Try to center it.

Step 6: Tie the long piece of yarn around the wrapped yarn, pulling it as tightly as possible. Keep the long strands to use for hanging purposes. Use scissors to cut through the loops on one side.

Step 7: Cut through the loops on the other side of the wrapped yarn as well.

Step 8: You will end up with a very shaggy misshapen blob of yarn. This will need to be trimmed into a much smaller ball shape. Basically, give it a hair cut!

Step 9: Tie the long strands of yarn together to create a loop with which to hang your ornament. Hang and enjoy your burst of color!

Happy crafting! xo, Lauren

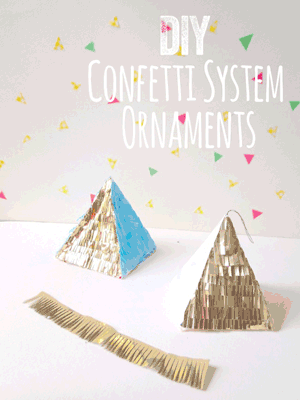
P.S. Check out my DIY Confetti System ornaments here and my DIY geometric garland here.


DIY Ornaments


DIY 'Confetti System' Ornaments

9.28.2012


I've always loved Confetti System's party decorations, but have never been able to afford them. When I came across their new ornaments over at West Elm it was no different. They're gorgeous and I was all set to buy one of each...til I saw the price tag. $12 per ornament? I guess twelve dollars doesn't sound like much, but add up the cost of purchasing all all five ornaments and you've got a whopping $60 on your hands. Now I'm not saying they're not worth every penny, but we're currently penny pinching here at the H-Haus. So I decided to have a go at making them myself. My first attempt was the pyramid-shaped ornaments. Here's how I created them:


© A Lovely Lark All rights reserved . Layout by Blog Milk Powered by Blogger

Pin It button on image hover