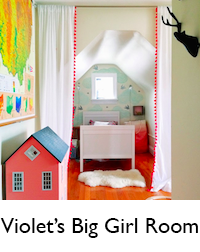
Just so you know, as I write this there is a gun being pointed at my head with a fickle finger on the trigger. Don't get me wrong, I want to help, but I am as distracted as she is fickle.
(Okay, Lauren interjecting here - this guest post was his idea I swear! Secrets about the Hubster revealed: not only is he easily distracted...he is also a HUGE procrastinator. So yes, he may be blogging at gunpoint, but only to get him to do the work that he graciously volunteered to do *wink wink* Love you honey!)
Let's start with the tools you will need to get the job done the right way.
Tools needed:
1. Pencil
2. Nail Set
3. Carpenter's Square
4. Finish Nails
5. Chalk Line
6. Sabre Saw or Keyhole Saw
7. Nail Gun or Hammer
8. Liquid Nails - Wood or Paneling will work (get a bunch of these)
9. Tape Measure
10. Sawhorses
A table saw is also very helpful if you have one, and obviously, you will need the beadboard itself. We purchased Georgia-Pacific MDF paneling at the Home Depot. We bought the panels pre-cut which was a huge time-saver. They are about 30-32 inches tall and four feet long.
Now that you have your tools, let's get started.
Assuming the baseboard trim has been removed, the first thing you need to do is lay out guidelines on the walls for the top of the paneling. To do this, measure from the floor up the wall. Your measurement should be the height of your paneling plus an extra quarter inch. Make a mark. Do this at each corner of the room. Next, strike a chalk line between the measured marks on the walls.
How to strike a chalk line:
If your house has an uneven floor like ours (older houses tend to have this problem), you will need to move along the line and recheck the measurement while looking for the highest point of the floor. If you find a difference, adjust your marks on the walls and strike a new line. You will use this new line to line up the top of your panels.
Now we can begin installation. Use the chalk line to guide the panels along the wall, keeping them straight and parallel. In the corners, you may need to scribe an angle if the walls are not perfectly square. (If it's only a small difference it can be hidden by trim in the corners.) Also, allow for a small space in between the panels of about 1/16-1/8 of an inch for expansion.
How to scribe an angle:
I used a sabre saw (jig saw) to cut out holes for outlets and to cut around windows. When fitting the paneling around window, it is preferable to remove the window casing if possible. It can be put back in place later to hide the edges. You can also use a sabre saw to cut panels to length at the end of a wall especially if they are not square.
To attach the panels, first use liquid nails. This is very easy, just cut the tip of the tube and puncture the inner membrane. Then squeeze out the liquid nails onto the beadboard and apply to the wall. Apply pressure on the panel to encourage the adhesive to stick.
Next, use a pneumatic nail gun (or you can use small finish nails with a hammer) to nail the edges of the panel to the wall. The nails at the top and bottom will later be hidden by trim. The nail holes on the sides can be filled with paintable caulk.
Repeat until the room is wrapped in a fresh coat of primed beadboard paneling. Lastly, install new baseboard trim and cap your bead board with chair rail moulding. Trim may also be needed for inside and outside corners. Then all that's left to do is paint and add trim - we used Behr's Ultra Pure White Semi-Gloss, but do whatever floats your boat. That's it - I'm all blogged out!
Thanks hubby for helping out with this post! I know the basics from watching him install it, but would not have been able to explain everything so well.
XOXO,


This comment has been removed by a blog administrator.
ReplyDeleteThis leaves the walls above the beadboard to be painted any color you desire. The beadboard can be tied into the rest of the bathroom's design by using vanity and medicine cabinets that have beadboard inserts in the door panels. Finish off the top of this wainscoting with a very simple rail molding. Add a baseboard below the beadboard to complete the look.
ReplyDelete