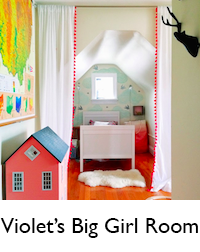
First of all, we had to find furniture that was the right height. Anything too tall wouldn't be able to sit flush against the wall. After solving this issue, we were left with how to decorate. Pictures frames, shelves, and most other traditional wall decor were all out. My thoughts went right away to wall decals, but I couldn't bring myself to pay the price for the larger decals that I liked, plus it was hard to find something that was just right.
After some thought, I decided to paint my own image. The hubster and I decided on a tree. We're loosely doing a woodland animals theme in Violet's nursery (but we don't want anything too over-the-top or cheesy). First I drew the tree onto the wall with some conte crayon. Chalk would work as well. Just make sure you use something that can be wiped off easily:
Next, I painted it with regular white wall paint. Finally, (after the paint dried) I wiped off the conte lines that were still showing with a wet rag. I definitely wanted a few leaves, but I felt like paint wasn't the right choice. I really wanted something with more texture. I considered wallpaper, fabric wall decals from this etsy seller, and custom magnetic fabric decals from this seller on etsy, before finally deciding to go with DIY fabric decals made by moi. I knew the fabric had to be lightweight and I didn't want anything too busy - just a subtle texture. I ended up going with a grey suit fabric that I found on sale (Yay!)
To create my decals, I first gathered my materials. You will need some sharp fabric scissors, fabric of your choice, an old paintbrush, a plate, and liquid corn starch. To make this just buy a box of corn starch at the grocery store (usually in the baking aisle), add some cold water, and finally add some boiling water and stir until you get it to your desired consistency. If your fabric is fairly thin, you'll need less starch. If it's a thicker fabric, add more:
Next, cut your fabric into the desired shape. Again, make sure you are using sharp fabric scissors, or your fabric may fray:
Place your cutout onto the plate, and paint both sides with the liquid corn starch. It should be well-coated, but not dripping.
Finally, place your fabric decal on the wall and go over it once more with the paintbrush. If any frayed edges do appear, smooth them back with a little corn starch. A light cornstarch film will appear on your wall around the decal. You can easily wipe this off later with a Cutip and a little water.
The decals can be easily removed by simply peeling them off of the wall and wiping off the cornstarch with warm water. And, of course, a post about the nursery wouldn't be complete without our little camera ham Charlie:
Here are a few other sites you might find interesting:


So clever! Thanks for sharing.
ReplyDeleteThis is so cool and creative!! I think your woodland theme is going to be so charming. Love that picture of Charlie. :)
ReplyDeleteI am so happy to have found this! I am decorating a nursery for our little girl. I love the tree decals on etsy, but can't justify the prices! I can't wait to try this out. Thank you so much for sharing!
ReplyDeleteThis is so cool and creative!! I think your woodland theme is going to be so charming. Love that picture of Charlie. :)
ReplyDeleteOh my! This is soo cool! I can't wait to try this!! :) Michelle
ReplyDelete